After creating a custom model, you may export a custom model (e.g., glossary) for editing or metadata integration to CSV format (or rolled up into worksheets in and XLSX format) file.
Steps
1. Sign in as a user with at least the Metadata Import / Export capability object role assignment for the custom model you wish to export to CSV format.
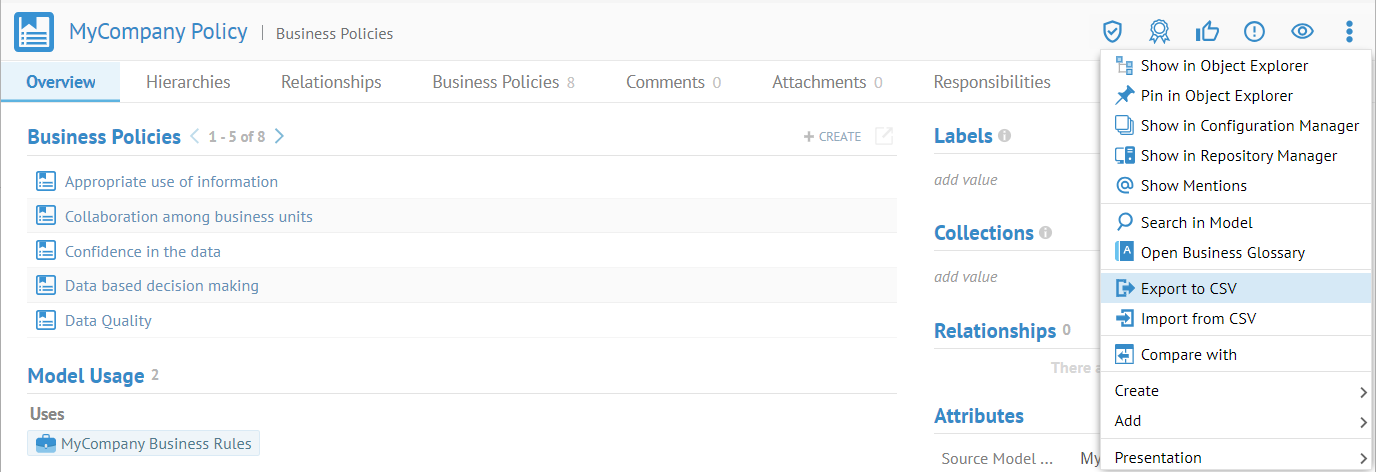
2. Navigate to the object page of the custom model or any “contained” (i.e., composition) object (e.g. a Term) within it.
3. Click More Actions and select Export to CSV.
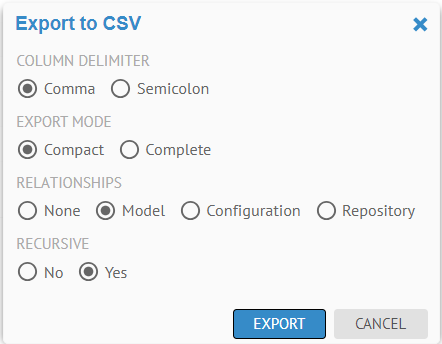
4. Specify options for export:
- COLUMN DELIMITER
o Comma separated
o Semicolon separated
- EXPORT MODE
o Compact mode
o Complete mode
The Complete mode generates the attribute file that depicts all objects in the model and all possible attributes. It can have imported objects that do not have any attributes set and mention attributes that are not set by any objects. The Complete model generates a relationship file for each used relationship type and has a delete relationship row for each object that has the relationship type. It allows you to reimport relationships from scratch.
The Compact model generates the attribute file that depicts only used attributes and only objects that have any of these attributes. It generates a relationship file for each used relationship type. You can use CSV files produced by Compact EXPORT MODE to move custom metadata to an empty model or imported metadata to an imported model without enrichments.
- RELATIONSHIPS
o None – do not export relationships
o Model – only export relationships between objects within this model (e.g., glossary)
o Configuration – only export relationships between objects in any model within the current configuration
o Repository – export all object relationships of which any object in the export is taking part.
- RECURSIVE
Specify Yes to include objects (e.g., terms) which are contained (i.e., composition) within the selected model or object (recursively down to the lowest level objects). Specify No to not include them.
5. Click EXPORT
Example
Sign is as Administrator and search for “MyCompany Policy”. Go to the object page for the model.
Click More Actions and select Export to CSV.

Specify options for export

Set the options as above and click EXPORT.
Click on the Operations icon in the header and open the log of the export operation. Open the operation, and when completed click Download Operation Files.
The CSV files are provided compressed as a .zip file. In this case there are two files, one for the Business Policy object type and one for the Enterprise Organization model type.
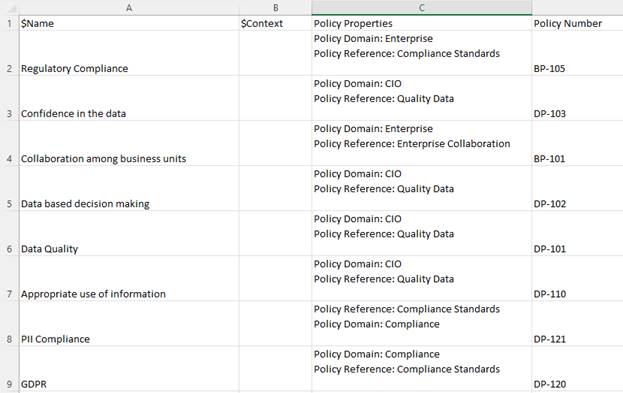
Open the .zip file and then the obj__Business Policy.csv file.

For attributes with multiple assigned enumerated value, you will
see an internal delimiter (Line Separator, Unicode \u2028) that allows the csv
to encode more than one value into a single attribute association.
